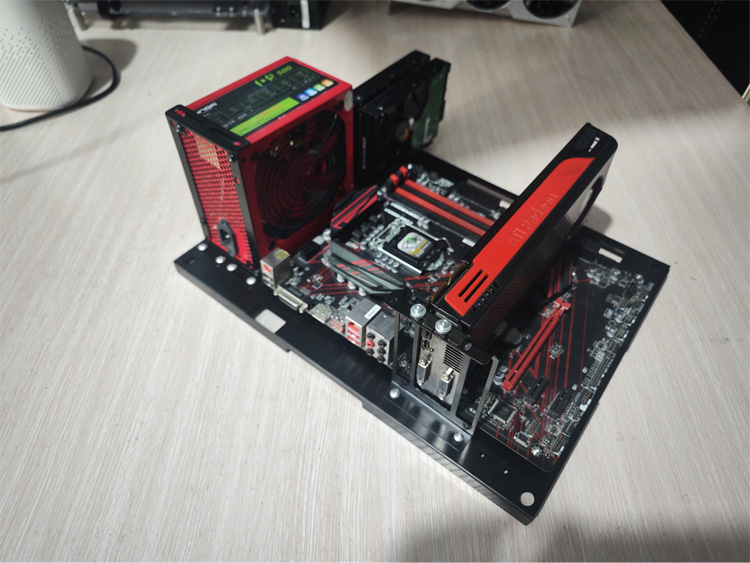
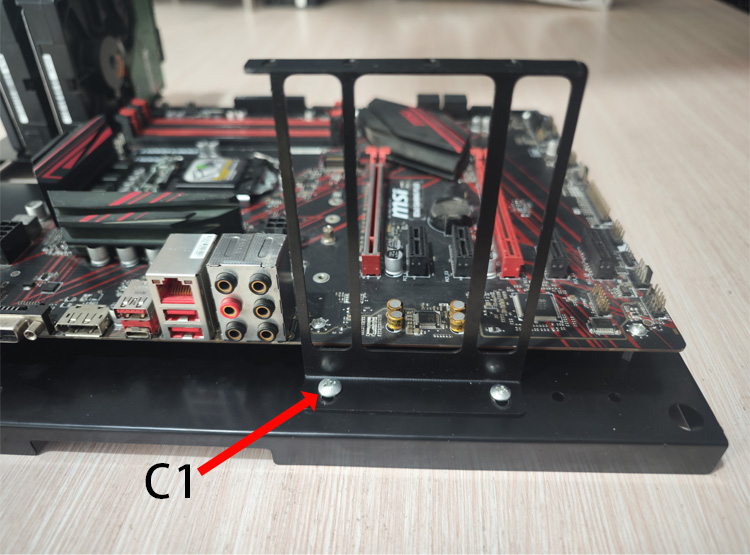
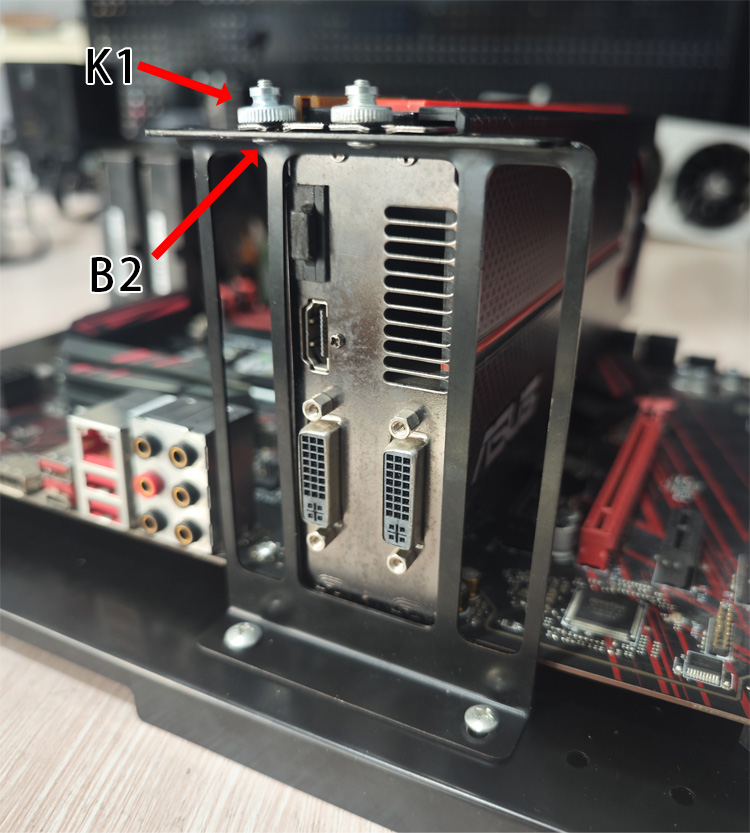
Completed Installation Reference Diagram
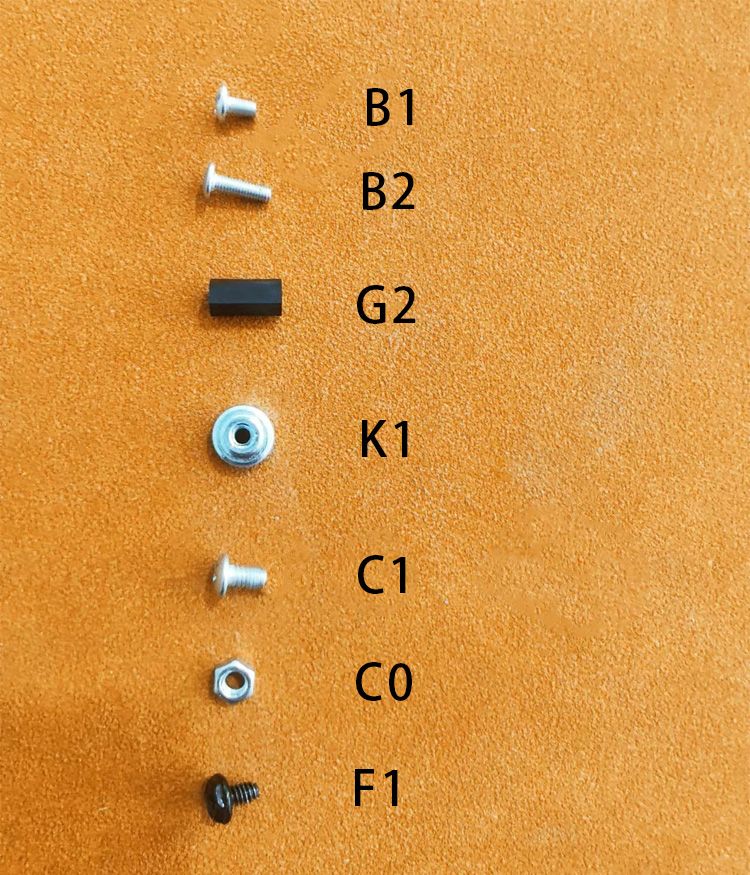
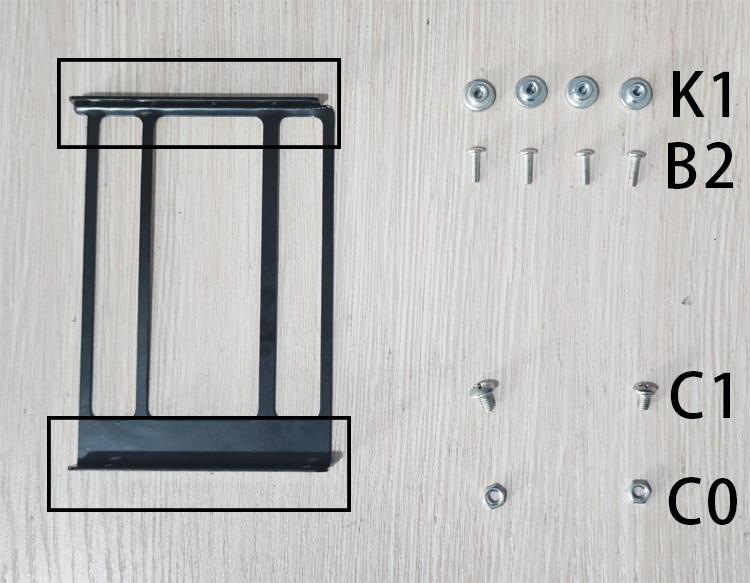
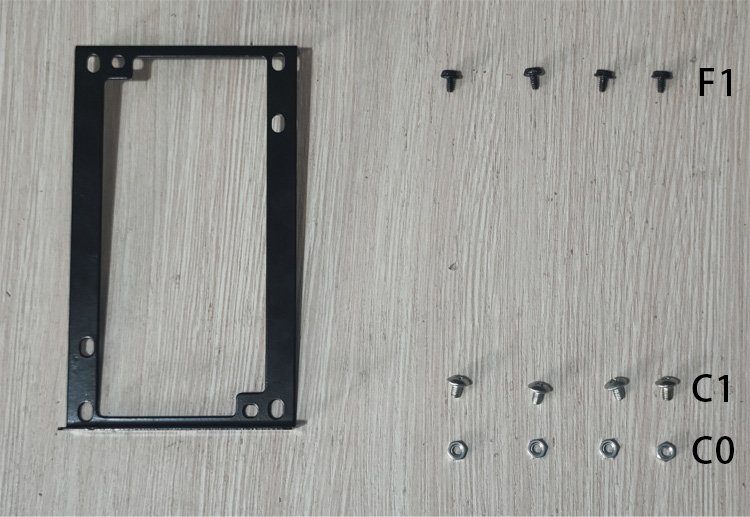
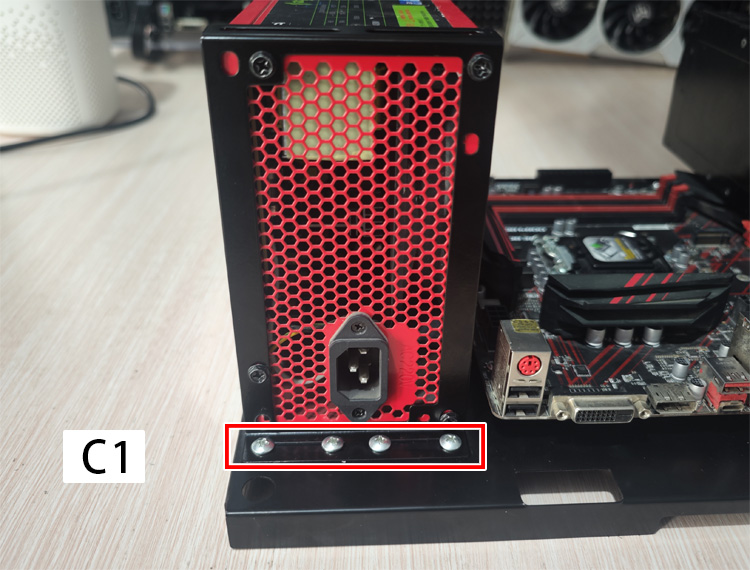
C1 is thicker than B1
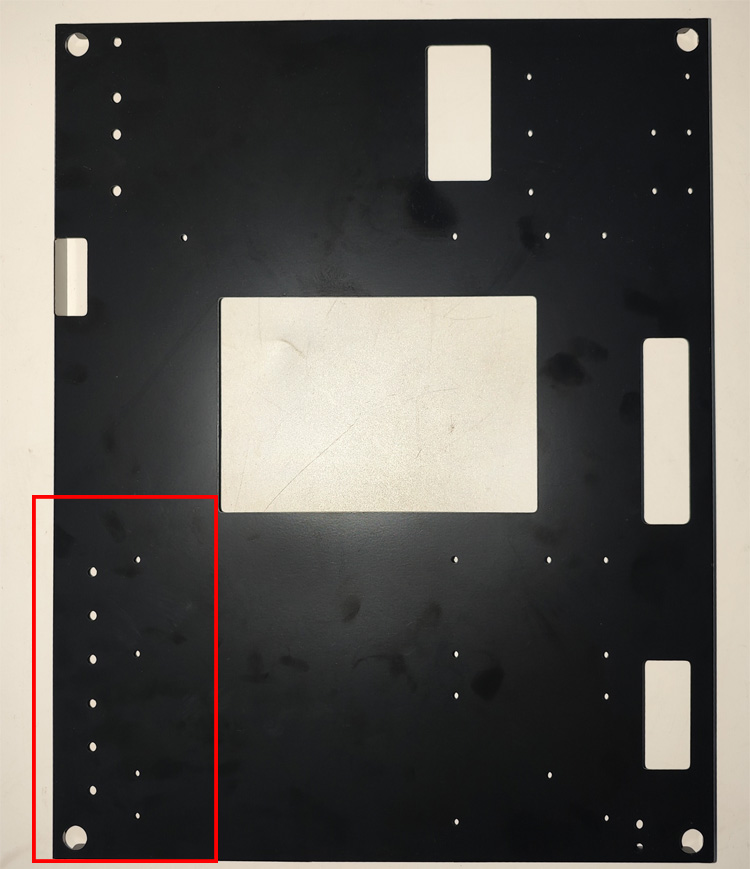
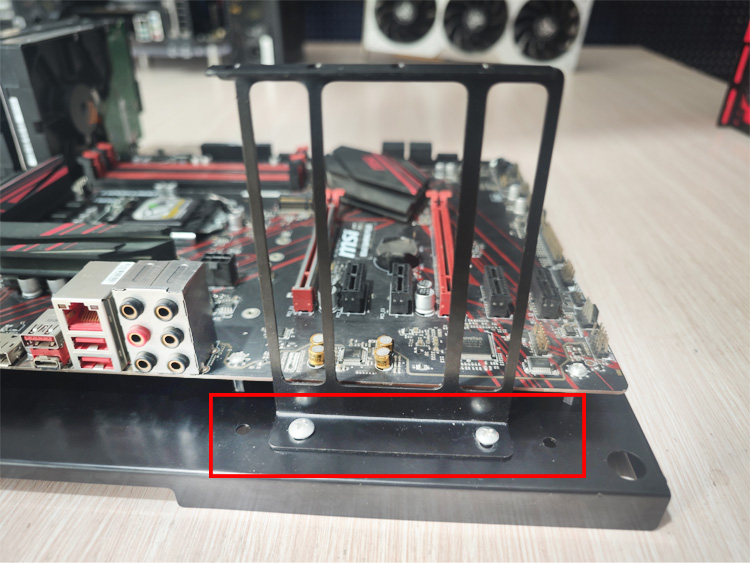
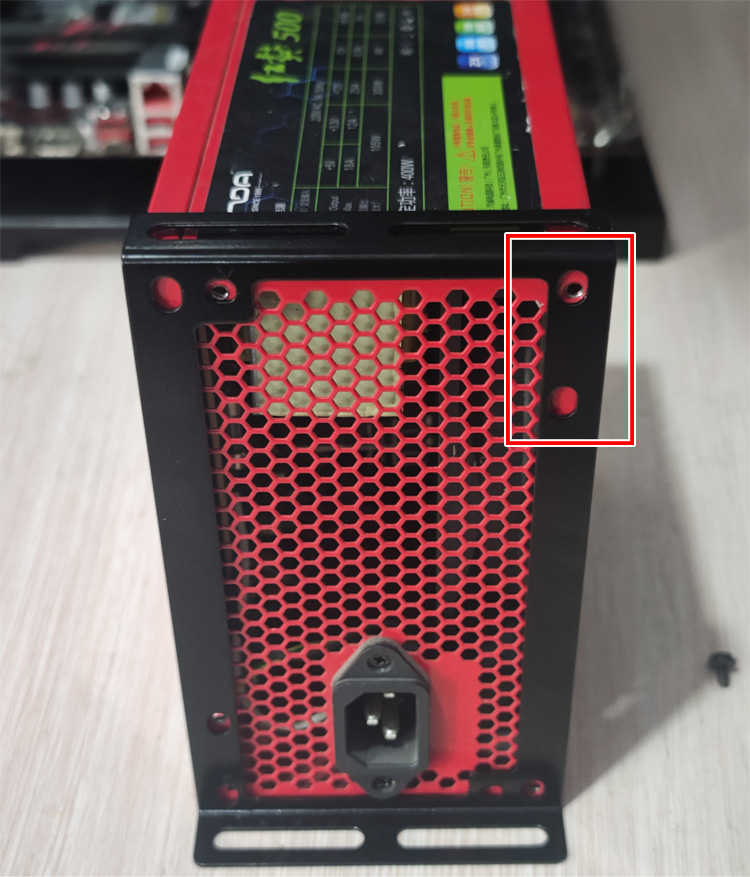
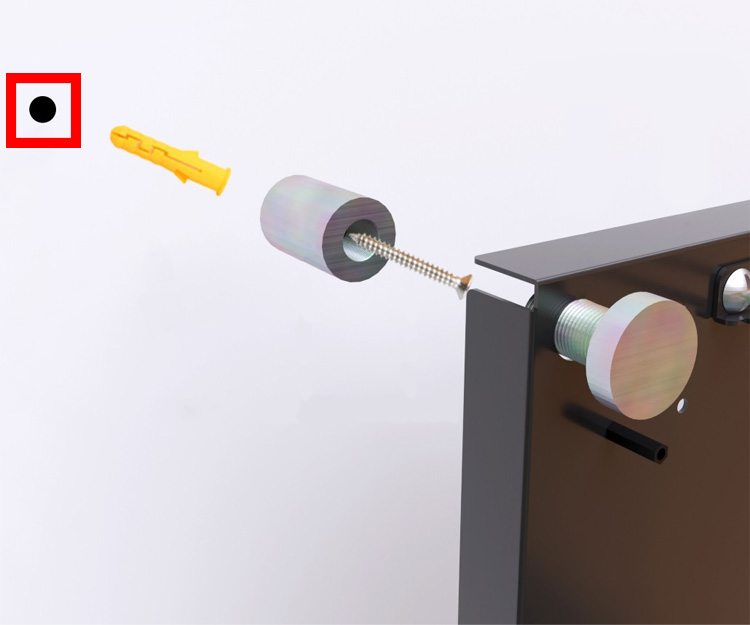
Place as shown in the figure, paying attention to the red position

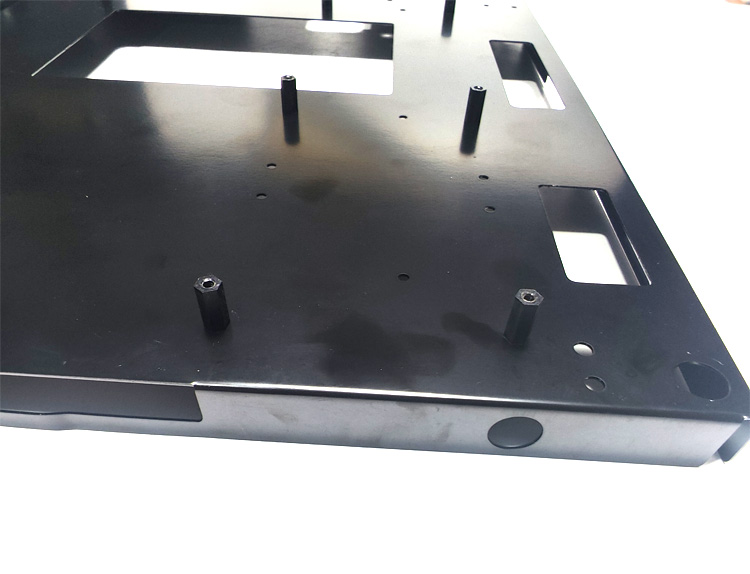
Installation of the plastic isolation pillar nut
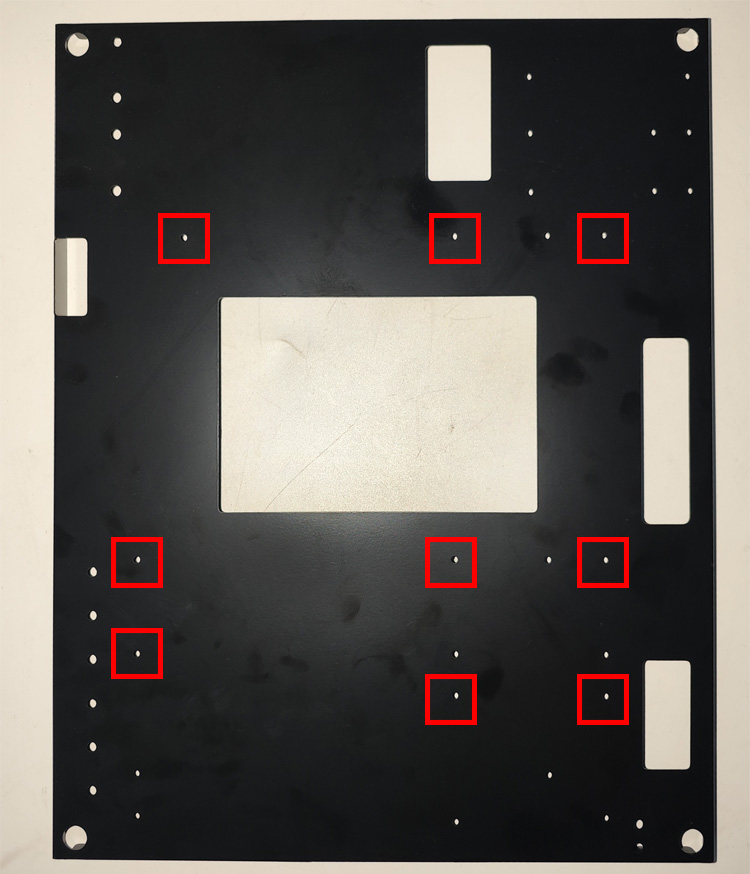
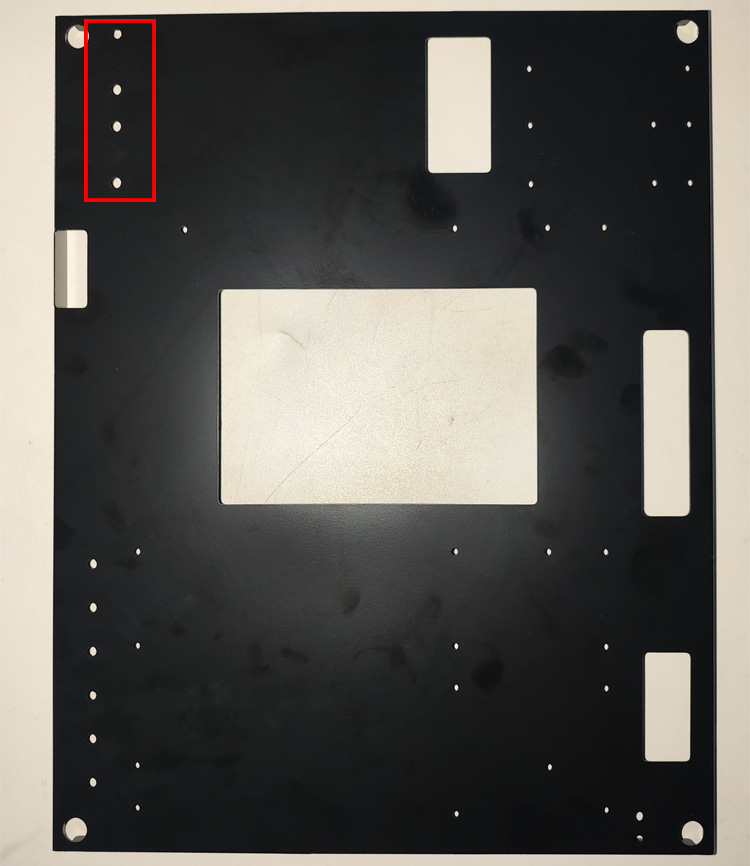
MATX mounting holes (reference)
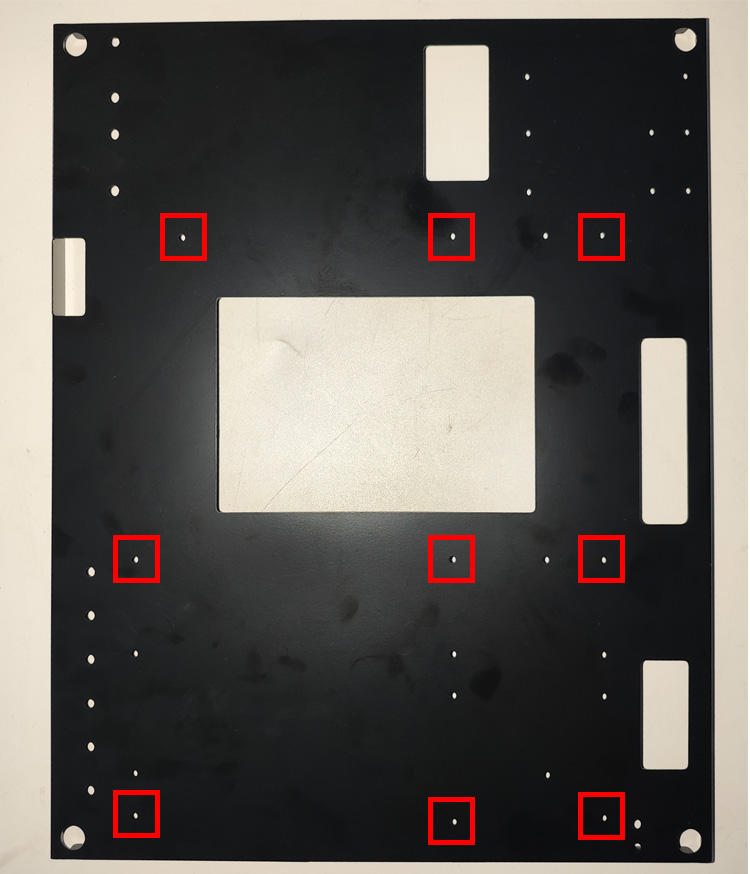
ATX mounting holes (reference)

Use B1 to secure the motherboard

Installation of hard disk
Red 3.5-inch drive
Green 2.5-inch drive

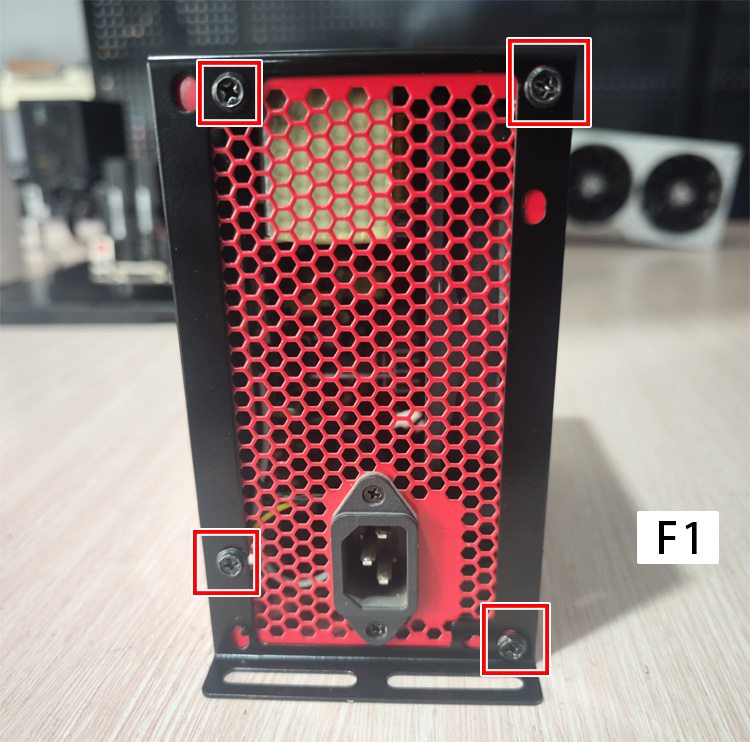
Securing a 3.5-inch hard disk with F1
Securing a 2.5-inch hard disk with B1
PCIE baffle can be moved
Power supply fixed position
position

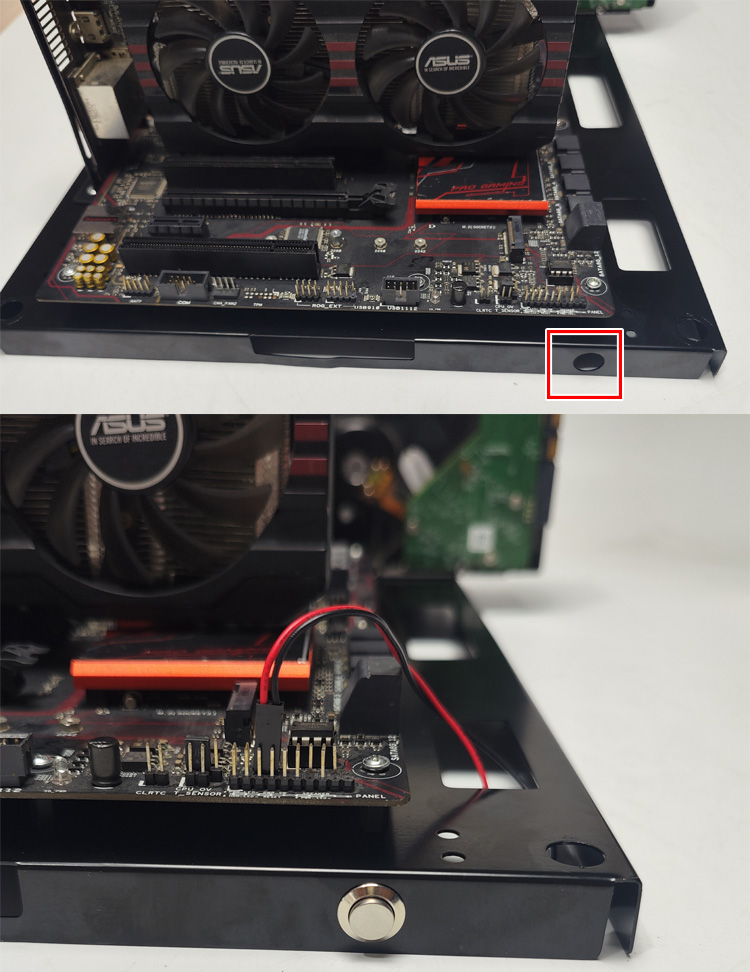
Switch mounting position

Common Jumper Wiring Locations
Wall mounting
Wall advance drilling
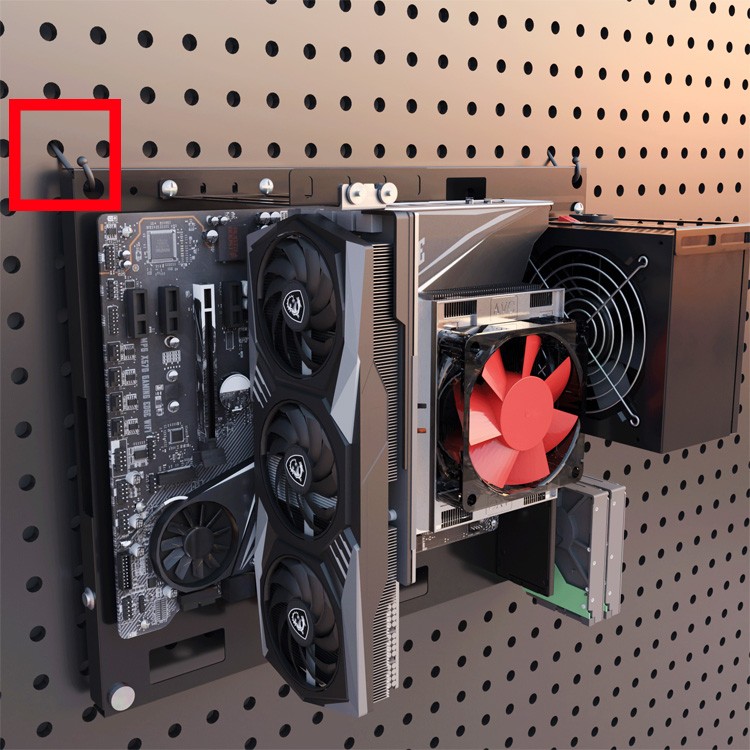
perforated panel
The hooks need to be prepared by yourself