Nuclear Switch Assembly Video
If the YouTube video becomes unavailable, you can download it here
Nuclear Switch Assembly Video Read More »
If the YouTube video becomes unavailable, you can download it here
Nuclear Switch Assembly Video Read More »
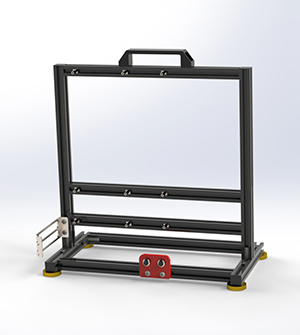
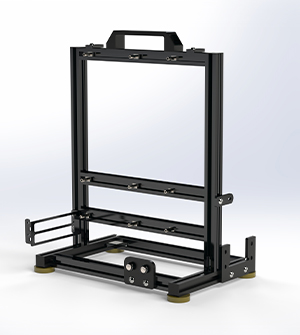
①The video tutorial link is below youtu.be/NaZ2qJm3owA ②The image tutorial is below To make the tutorial clear, we use spray-painted pillars and colored acrylic panels. Tip: C2 is thicker than B2, and C1 is thicker than B1. Take out the parts shown in the image. Insert L1 into the sliding rail. Align the top of
Handled PC EATX-RED Read More »
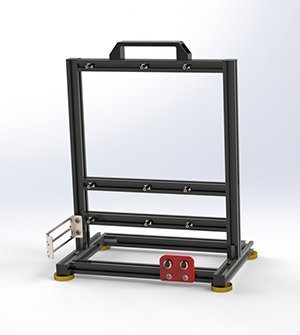
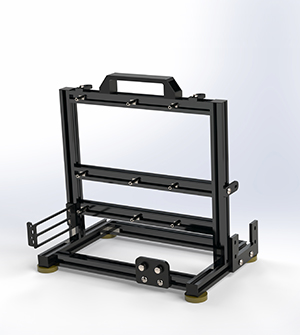
①The video tutorial link is below youtu.be/VQdLAMrE-wU ②The image tutorial is below To make the tutorial clear, we use spray-painted pillars and colored acrylic panels. Tip: C2 is thicker than B2, and C1 is thicker than B1. Take out the parts shown in the image. Insert L1 into the sliding rail. Align the top of
Handled PC ATX-RED Read More »
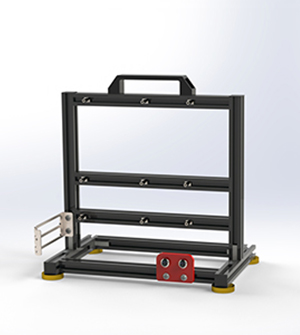
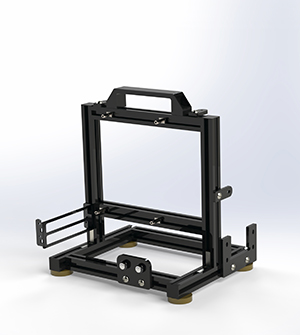
①The video tutorial link is below youtu.be/5y6b18FBPdM ②The image tutorial is below To make the tutorial clear, we use spray-painted pillars and colored acrylic panels. Tip: C2 is thicker than B2, and C1 is thicker than B1. Take out the parts shown in the image. Insert L1 into the rail, pay attention to the direction
Handled PC MATX-RED Read More »
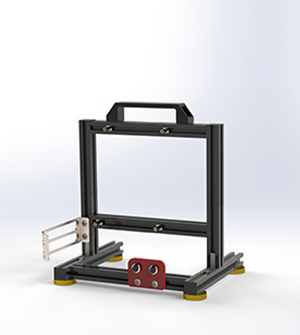
①The video tutorial link is below youtu.be/V40pBNRvmDI ②The image tutorial is below To make the tutorial clear, we use spray-painted pillars and colored acrylic panels. Tip: C2 is thicker than B2, and C1 is thicker than B1. Identify the parts shown in the image. Insert L1 into the sliding rail. Align the top of the
Handled PC ITX-RED Read More »

①The video tutorial link is below youtu.be/NaZ2qJm3owA ②The image tutorial is below To make the tutorial clear, we use spray-painted pillars and colored acrylic panels. Tip: C2 is thicker than B2, and C1 is thicker than B1. Take out the parts shown in the image. Insert L1 into the sliding rail. Align the top of
①The video tutorial link is below youtu.be/VQdLAMrE-wU ②The image tutorial is below To make the tutorial clear, we use spray-painted pillars and colored acrylic panels. Tip: C2 is thicker than B2, and C1 is thicker than B1. Take out the parts shown in the image. Insert L1 into the sliding rail. Align the top of
①The video tutorial link is below youtu.be/5y6b18FBPdM ②The image tutorial is below To make the tutorial clear, we use spray-painted pillars and colored acrylic panels. Tip: C2 is thicker than B2, and C1 is thicker than B1. Take out the parts shown in the image. Insert L1 into the rail, pay attention to the direction
①The video tutorial link is below youtu.be/V40pBNRvmDI ②The image tutorial is below To make the tutorial clear, we use spray-painted pillars and colored acrylic panels. Tip: C2 is thicker than B2, and C1 is thicker than B1. Identify the parts shown in the image. Insert L1 into the sliding rail. Align the top of the
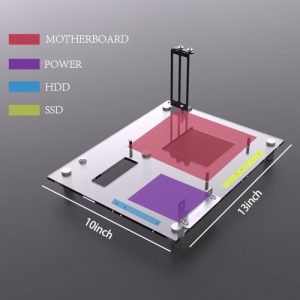
C2 is thicker than B2 Place as pictured Leg column installation position Installation of motherboard isolation posts Use B1 to secure the motherboard Universalhoe positions for mechanicalhard drives/solid-state drives Mounting a Hard Disk with B2 If the PClE board blocks the video output interfaceCan be misaligned to give way to the interfac Fixed position of