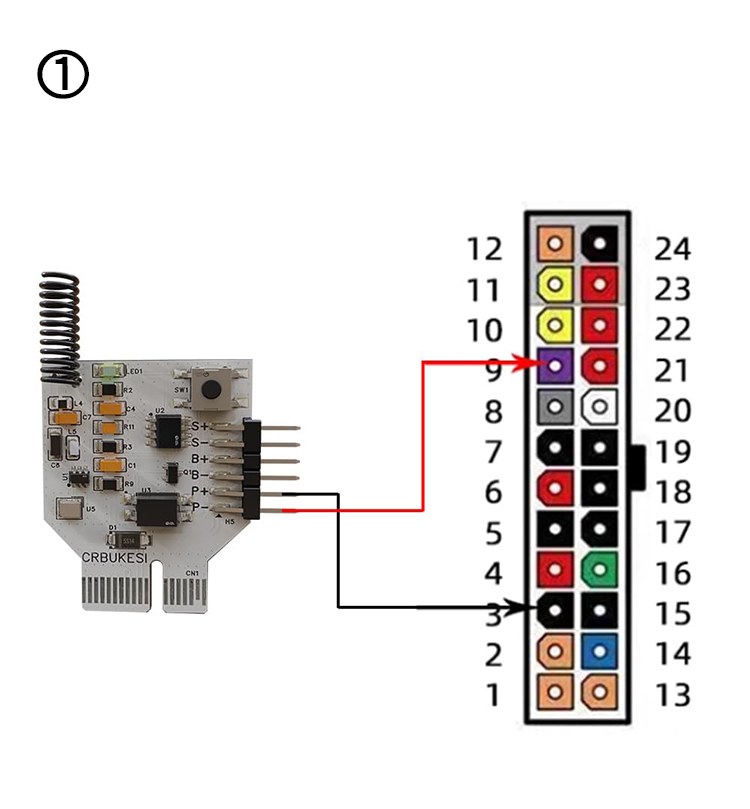
Solution for PCB power supply
Solution for PCB power supply Read More »
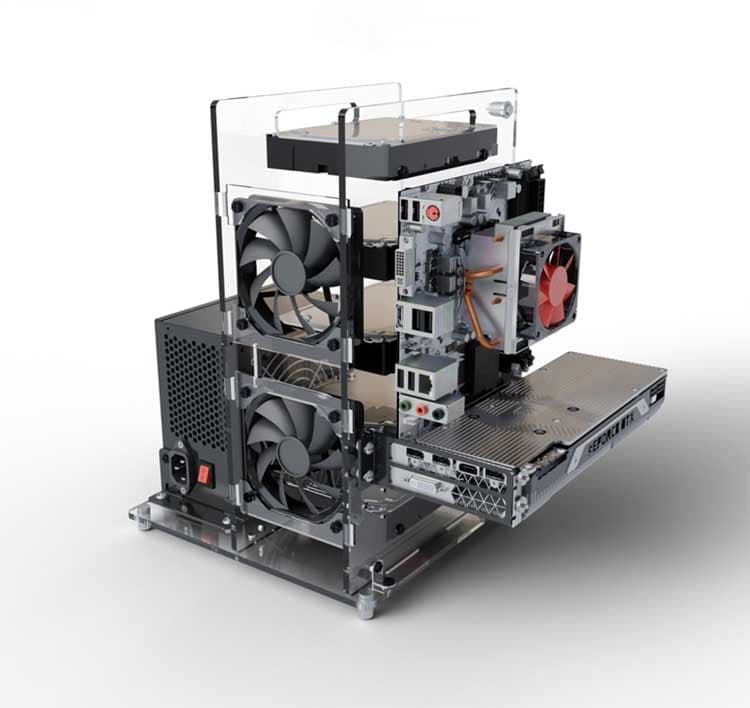
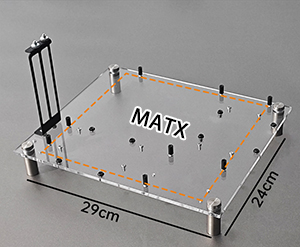
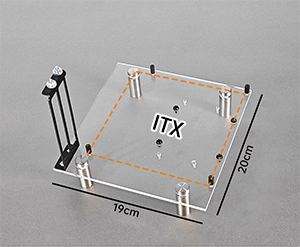
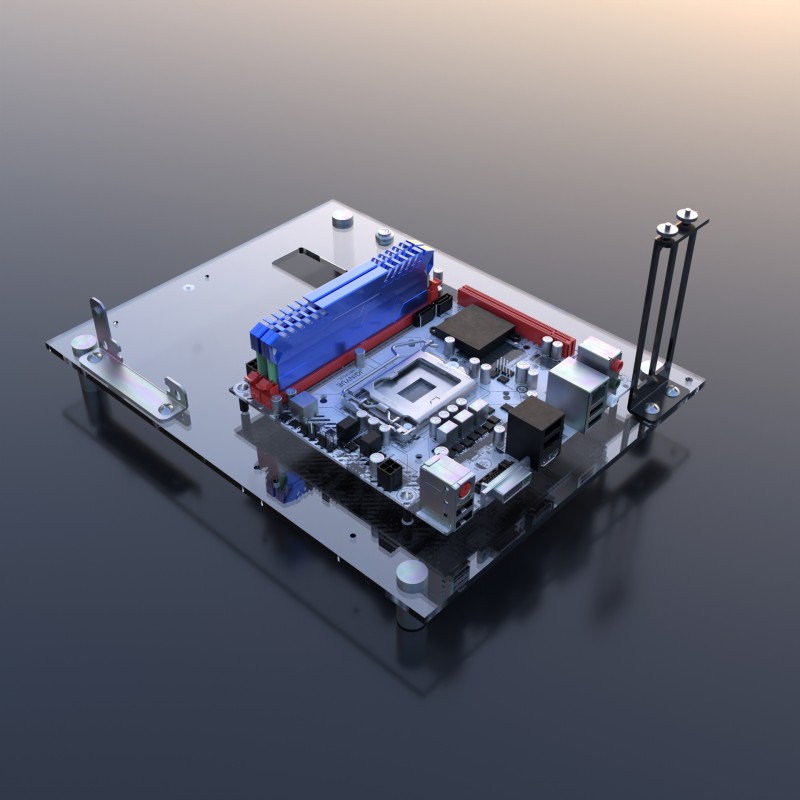
Installation reference diagram Install as shown above, pay attention to the left side, otherwise rework is required ITX motherboard installation position (for reference only) MATX motherboard installation position (for reference only) Install standoffs Installation holes depend on your motherboard Install as shown above, pay attention to the right side!!! Otherwise rework is required Hard drive
Place as shown Leg pillar installation position Note: Install the hard drive first, then install the motherboard Hard drive mounting position Use F2 to secure the mechanical hard drive Use B2 to secure the solid-state drive Install standoffs Mounting hole positions depend on your motherboard ATX motherboard holes (for reference only) MATX motherboard holes (for
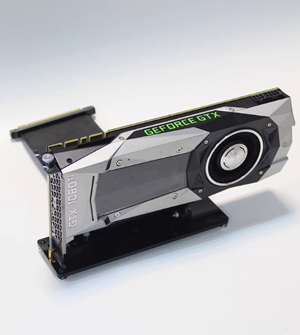
Place as shown Leg pillar installation position Note: Install the hard drive first, then install the motherboard Hard drive mounting position Use F2 to secure the mechanical hard drive Use B2 to secure the solid-state drive Install standoffs Mounting hole positions depend on your motherboard Use B1 screws to secure the motherboard If the PCIE
Place as shown Leg pillar installation position Note: Install the hard drive first, then install the motherboard Hard drive mounting position Use F2 to secure the mechanical hard drive Use B2 to secure the solid-state drive Install standoffs Mounting hole positions depend on your motherboard Use B1 screws to secure the motherboard If the PCIE
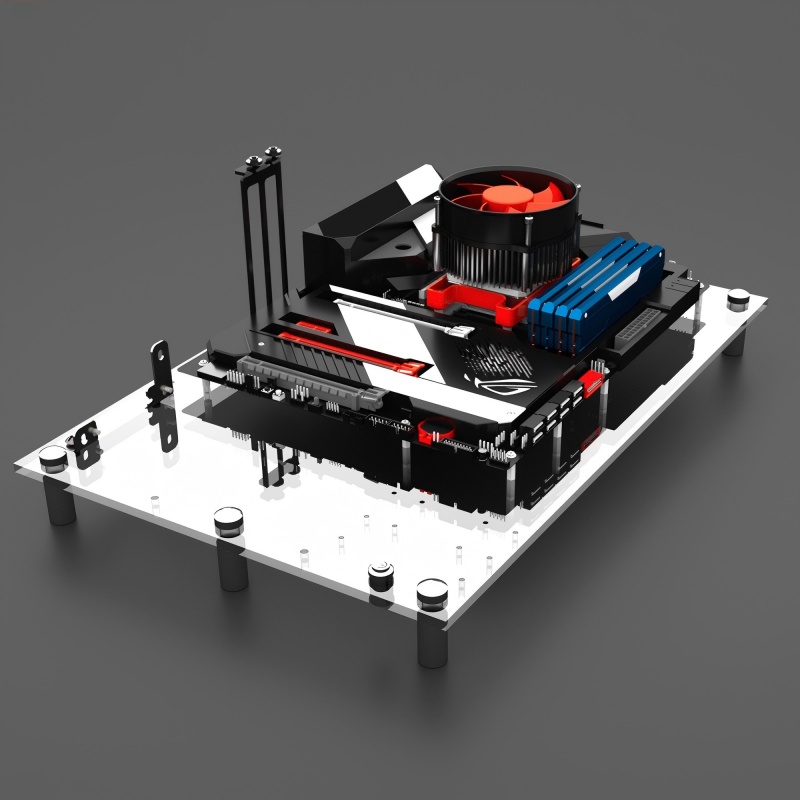
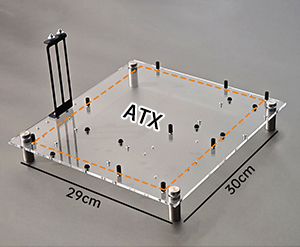
Installation Reference C2 is thicker than B2 Place as shown Leg pillar installation position Note: Install the hard drive first, then install the motherboard Red: 3.5-inch HDD Green: 2.5-inch HDD Use F2 to fix 3.5-inch HDD, use B2 to fix 2.5-inch HDD Install standoffs, mounting holes depend on your motherboard ATX motherboard holes (for reference
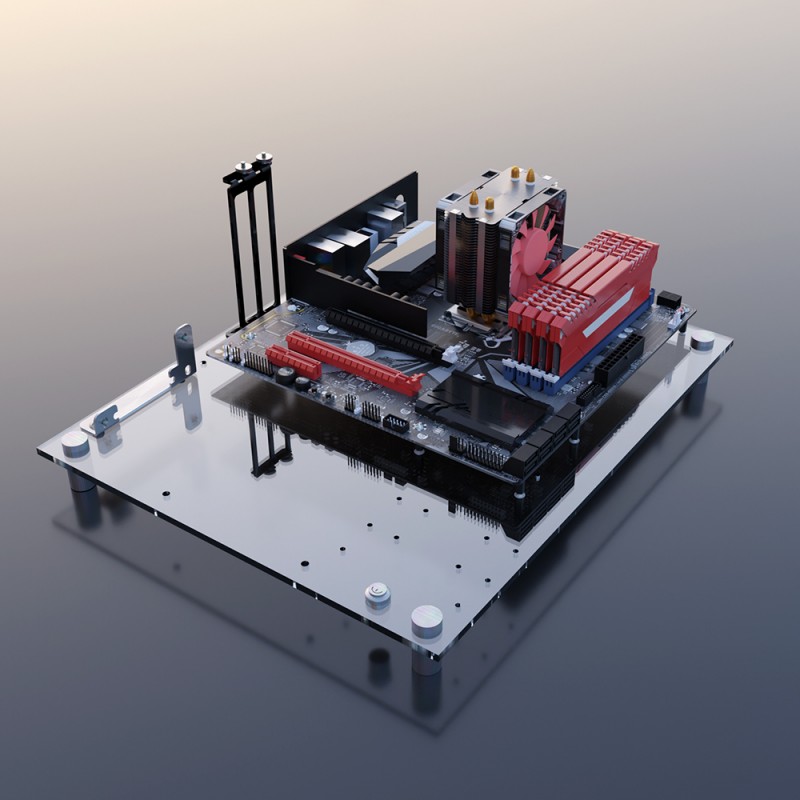
Installation Reference C2 is thicker than B2 Place as shown Leg pillar installation position Note: Install the hard drive first, then install the motherboard Red: 3.5-inch HDD Green: 2.5-inch HDD Use F2 to fix 3.5-inch HDD, use B2 to fix 2.5-inch HDD Install standoffs, mounting holes depend on your motherboard MATX motherboard holes (for reference
Installation Reference C2 is thicker than B2 Place as shown Leg pillar installation position Note: Install the hard drive first, then install the motherboard Red: 3.5-inch HDD Green: 2.5-inch HDD Use F2 to fix 3.5-inch HDD, use B2 to fix 2.5-inch HDD Install standoffs, mounting holes depend on your motherboard MATX narrow board holes (for
The video tutorial link is youtu.be/bSBMAks5Qjc
Vertical GPU Installation Guide Read More »